Reset Ink Level Epson SC-P600 Printer
New Post has been updated and published with link: https://chiplessprinter.com/reset-epson-p600-p607-p608-px5v2.html
I. Overview Key reset to make Epson SC-P600 printer Chipless
– The ink chips was installed on all of the ink cartridges of the Epson SC-P600 printer. These chips interact with the printer software installed on the computer, allowing users to track the printer’s ink status. Report the amount of ink remaining to the user through the “Epson Status Monitor” or on the LCD screen of the printer (if it has).
– When the “Epson Status Monitor” or on the printer’s LCD screen announces: ‘Black, Yellow, Magenta, Cyan ink cartridge is low’, ‘Black, Yellow, Magenta, Cyan ink cartridge near end’, ‘Black, Yellow, Magenta, Cyan ink cartridge is empty’ then Epson SC-P600 printer has been near end or runs out of ink (one or several colors). Now, If you want to the printer continue printing, there are two options: replace continuous ink supply system – CISS to cost savings or replace the genuine cartridge with high price.
– Currently, the Epson SC-P600 printer does not have what are continuous ink supply system compatible with it, so technicians have to manually create continuous ink supply system. However, when it was installed on the printer, some error message appears: “Ink Level Error” or “Ink Out Error” and the printer can not print. This is because the chip on the continuous ink supply system (CISS) is incompatible with your printer Epson SC-P600, saying exactly it is not compatible with the printer’s current firmware. At this time, you need to change firmware version to default with disabled ink cartridge in service mode by Key reset to make Epson SC-P600 printer Chipless so that the printer can function normally without the cartridge chip. This causes your Epson SC-P600 printer will show 100% ink level all time you use it, it will not need to ink cartridges chips or CISS chips will be required anymore.
II. How to use Key reset to make Epson SC-P600 printer Chipless
– To disable the ink cartridge chips of Epson SC-P600 printer you must perform in Service Mode
– The following are steps using the Key change firmware version make to Epson SC-P600 chipless.
Step 1: Download, install and Open the WIC program
– Free Download Resetter For Windows: 
– Free Download Resetter For MAC OS: 
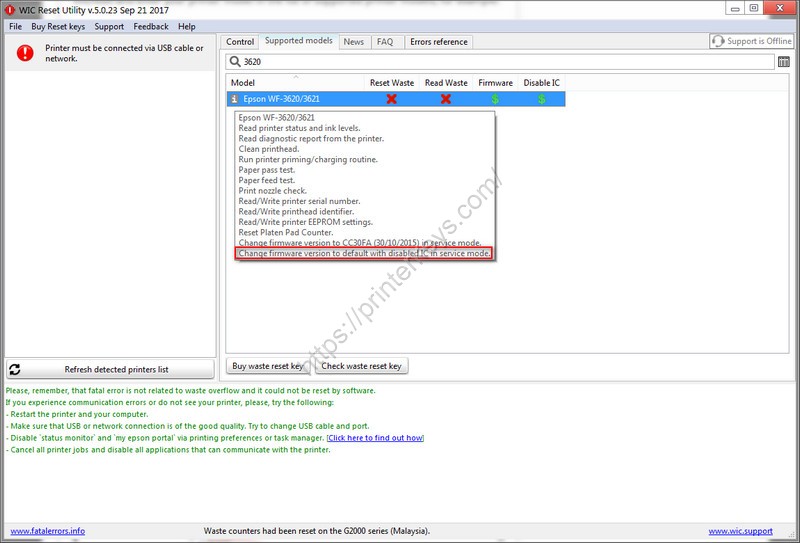
Step 2: Go to tab “Supported models” on the WIC program and type the short name of Epson SC-P600 printer to checked your printer whether to support “Change firmware version to default with disabled ink cartridge in service mode” or not.
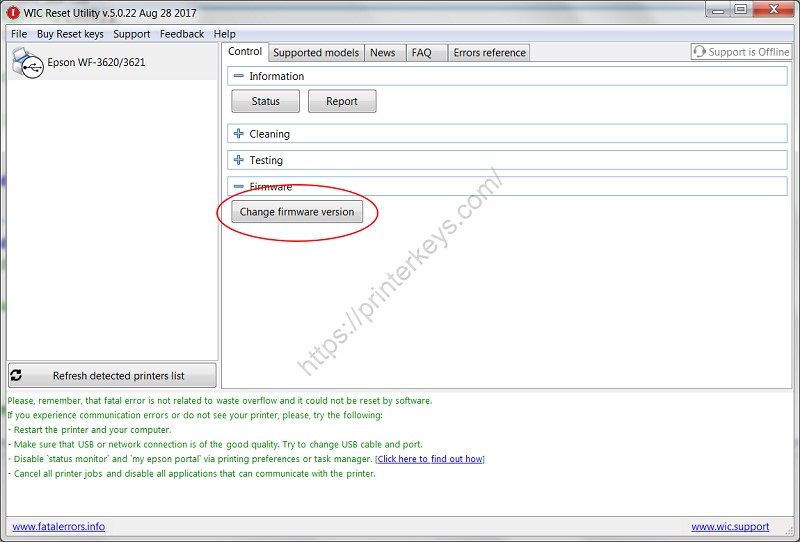
Step 3: Click to “Firmware/Change firmware version”
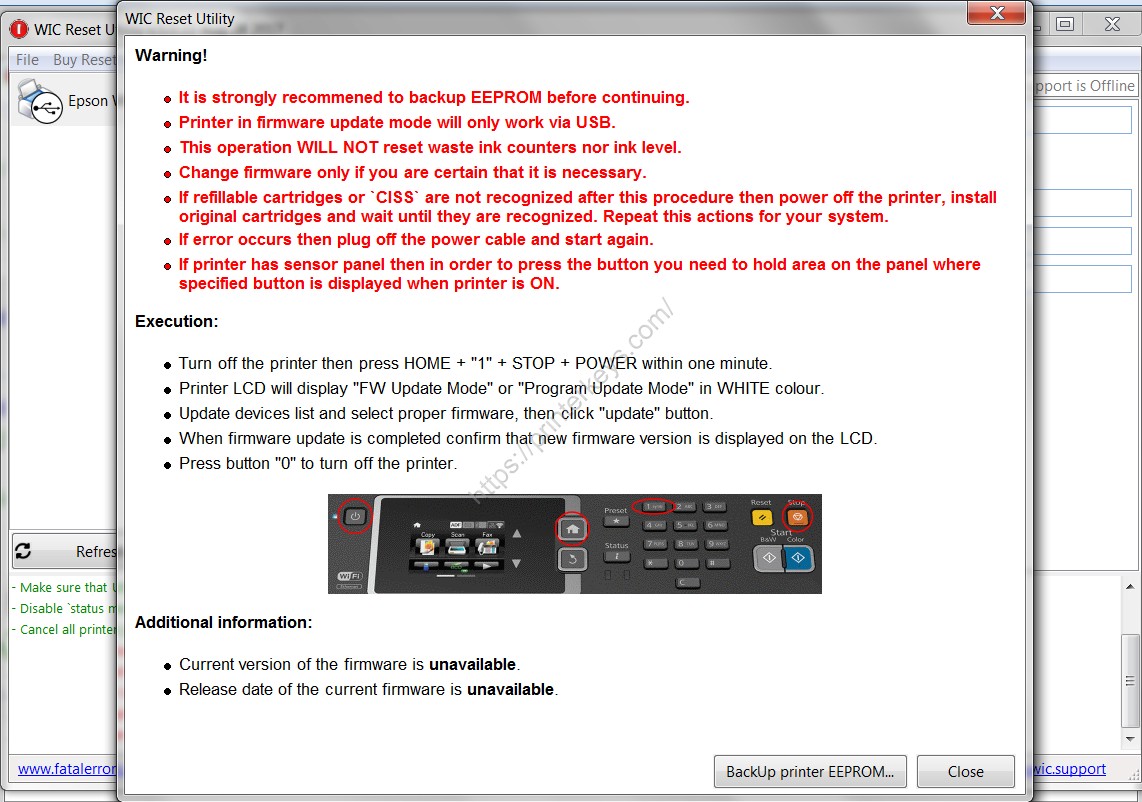
Step 4: Make to the following steps to login “Service Mode” of Epson SC-P600 printer (Firmware Update Mode). After login to “Service Mode” the name Epson SC-P600 will be display Epson MFP-IPL, please pay attention on it.
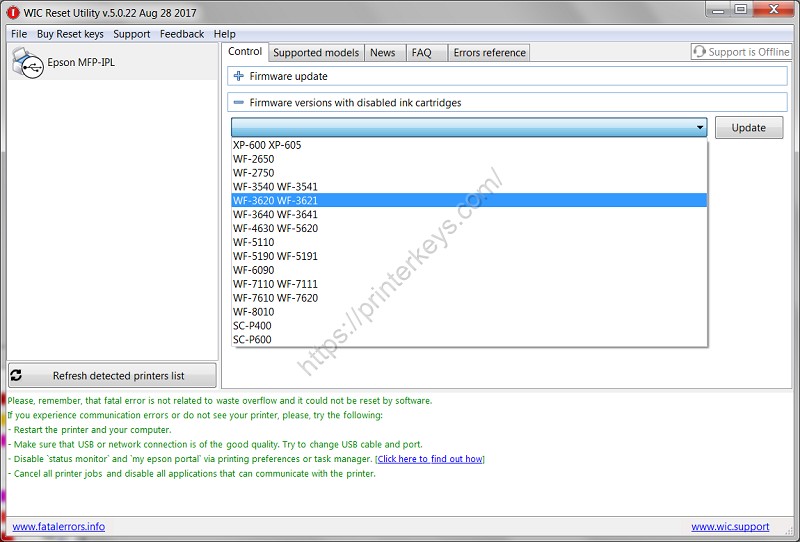
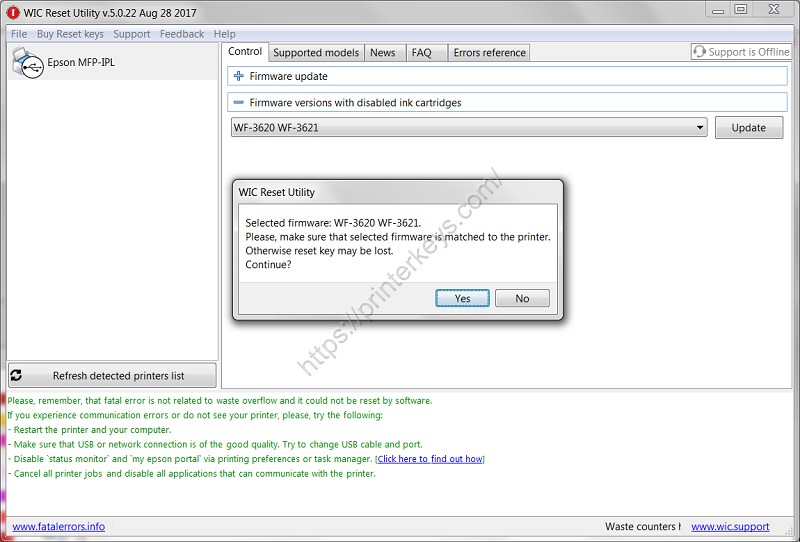
Step 5: Select the Firmware version with disabled ink cartridge of Epson SC-P600 printer in dropdown list. Then click to “Update”
Step 6: Click “Yes”
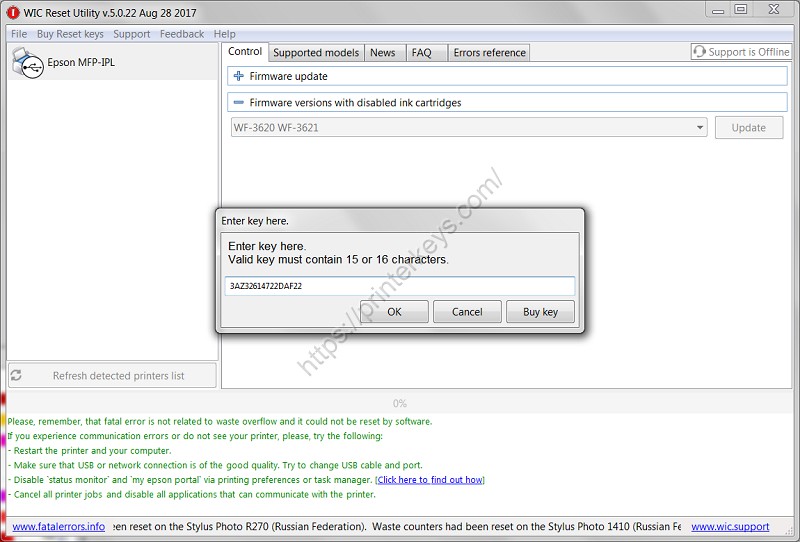
Step 7: Insert Key disabled ink cartridge Epson SC-P600 printer into text box “Insert Key here” and then “OK”
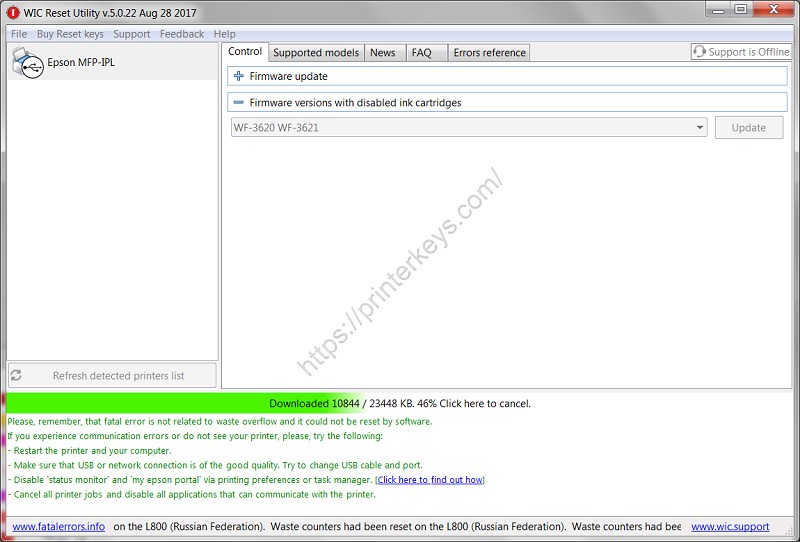
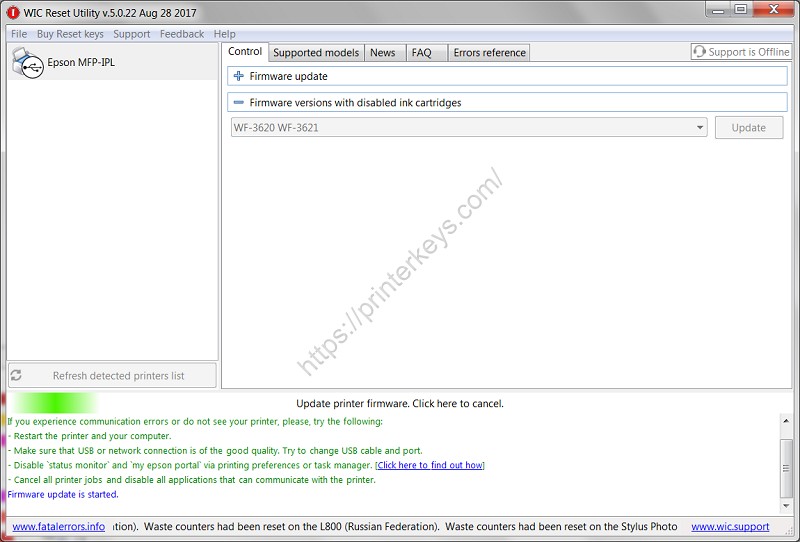
Step 8: You has change firmware version to default with disabled ink cartridge in service mode by Key reset to make Epson SC-P600 printer Chipless successfull. Click “OK” to complete.
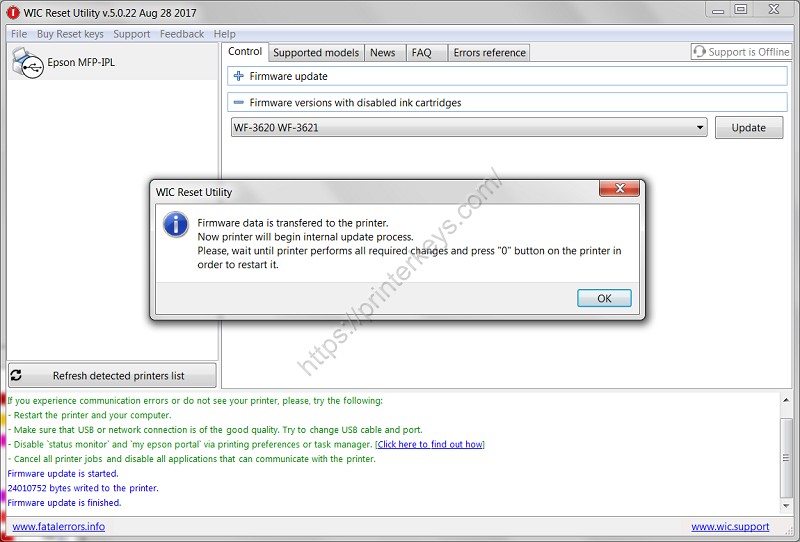
So, We are updated Firmware and made Epson SC-P600 chipless (Update Firmware Versions with Disabled ink Cartridges)