Reset Page Count Dell B1160W
Reset Page Counter Dell B1160W : $18 USD
[yoopal price=”18.00″ fv=”https://printerkeys.com/find-version-dell-b1160w.html” fs=”https://printerkeys.com/how-to-find-printers-serial.html” fc=”https://printerkeys.com/find-crum-dell-b1160w.html”]
Dell B1160W Reset Overview:
– Product name: Dell B1160W Permanent Reset Page Counter.
– Version: .89f, V3.70.01.09.
– Compatible models: Dell B1160W.
– Compatible toner cartridges: HF44N, Dell Part# : 331-7335.
– Functional: reset page counter Dell B1160W, fix Dell B1160W toner cartridge errors with red light and red light blinking: install new toner cartridge, toner life end, replace new toner cartridge, toner empty, toner exhausted…Makes Dell B1160W printer to work without toner chip
How to Reset Page Counter Dell B1160W

– Before you continue with the reprogramming of the firmware, please make sure that the device is installed on your computer.
– It is very important that under no circumstances should you remove the chip from the cartridge while reprogramming the firmware. After you have succesfully reprogrammed the printer, remove the chip from the cartridge and store it somewhere safely (the chip – a key). In all cartridges which you are going to use in the printer, the chip has to be either removed or sealed. If you have accidently inserted a new cartridge without removing the chip, the device will be blocked. In order to unblock it, you can use the stored chip as a key which help you to unblock the printer.
– And make sure that any other devices (except mouse and keyboard), which are connected to your computer via USB or LPT ports are disconnected. It’s preferable that the computer is connected to the “UPS” (uninterruptible power source) device, because if during the reprogramming process the electricity source has any interruptions, then the reprogramming will be carried out with an error, which makes the device unable to work.
– This firmware will be installed directly to your printer. Before opening firmare make sure that printer is turned on and connected to your computer and printer drivers are installed correctly.
– Be aware that with the reprogramming of the firmware the manufacturer’s warranty goes lost!!
1. Connect the printer to the computer by usbcable and install it.
2. Install Microsoft .NET Framework Version 2.0 program (only for OS older than Windows 7)
3. Set Plugin ClickOnce for your browser (Internet Explorer supports by default)
Plugin for Google Chrome
Plugin for Firefox
4. Click on link, which you get after payment for firmware
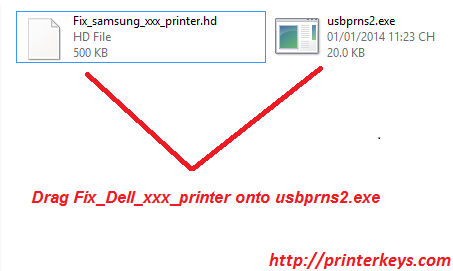
![/></center><br />
<strong>5.</strong> After it firmware download begins (downloading time is about 2-4 min depend of internet)<br />
<strong>6.</strong> Wait until the printer reprograms (<strong>1-3 min</strong>) and restarts ( if indicator blink that’s mean that printer start reprograming)<br />
<strong>7.</strong> After that the reprogramming process is finished, restart the printer</p>
<p><strong>Warning!</strong> Firmware will be available for installation only for <strong>6 hours! </strong>So please make sure you will be able to install firmware during 6 hours before ordering it!</p>
<h2>Reset Page Counter Dell B1160W : $18 USD</h2>
<p>[yoopal price=”18.00″ fv=”https://printerkeys.com/find-version-dell-b1160w.html” fs=”https://printerkeys.com/how-to-find-printers-serial.html” fc=”https://printerkeys.com/find-crum-dell-b1160w.html”]</p>
<h2>Reset Dell B1160W Search Terms</h2>
<pre>
- Dell B1160W Reset.</br>
- Fix Dell B1160W Toner Errors: install new toner cartridge, toner life end, replace new toner cartridge, toner empty, toner exhausted...</br>
- Permanent reset chip Dell B1160W.</br>
- Permanent reset page counter Dell B1160W.</br>
- Dell B1160W Firmware Reset.</br>
</pre>
<div class=](https://printerkeys.com/wp-content/uploads/firmware-samsung-slm.png)